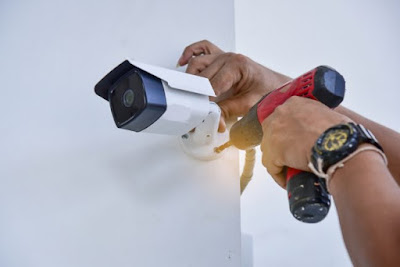
CCTV Installation
CCTV Installation: Step-By-Step Guidance At Your Fingertips
Closed
Circuit Television or CCTV is a security device which is really
pertinent these days. It not only provides you with the security alerts but
with the help of this, you can get all the visualized images of the area of its
installation whenever you want. A better security camera can function in every
weather and all throughout the day. If you are planning to buy a security
camera for your office or home, then before that you need to check out the
process of CCTV installation. To install a CCTV device some of the basic things
you need to keep in mind which includes the installation location, power
supply, and better internet service.
Best Locations For
Installing CCTV
If you
are an initiator to perform the CCTV
Installation task, then at first you need to find a better
location. And to do this, you need to check some of the basics criteria which
are as follows.
- There should be no barrier near to the installation location.
- A Power Source should be near to it.
- Check the wire length of your CCTV camera.
- Weather protecting shade for the weather sensitivity CCTV security camera.
Schools,
colleges, offices, hospitals, and showrooms are some of the crucial locations
where the indoor security camera is a necessary device to install. And for the
roadsides, the outdoor cameras have its utilities.
Steps Of Installing A CCTV
Camera
If you
are planning to install a CCTV camera in your society, then follow this below
steps in details to learn the CCTV installation process.
Step 1:
Select A Perfect Location
The
better the location you pick, the better the view and the wider the view you
will be getting. It is best to place the security camera in a top corner of a
wall, from where the total room can be focused. As the high you locate the
camera, the more the security the rest assured you can be. And if you want to
place the security camera at outside, then it is best to place the device at a
minimum of 10 feet in height. Furthermore, this is quite a height which shall
be shielding your CCTV camera from being knocked down.
Step 2:
Place The Camera In A Secure Manner
It is
best to use screws for the CCTV Installation process. Some of the security
cameras come with stick pads, which helps in attaching the camera device on the
walls, but these are not that secure. So, instead of the stick pads try to use
screws by drilling on the walls with the help of an electric drilling machine.
After making all these location arrangements, mount the security camera on the
wall with the help of screws.
Step 3:
Connect Your CCTV Camera With A Power Source
As the
camera gets located, now take the power cable which comes with your CCTV
package. After that, plug the round portion of the cable to your CCTV camera
device and the other end with the power source. And if you find that the power
cable does not work, then contact the device manufacturer to replace it.
Step 4:
Attach The Wired Camera With A Digital Video Recorder (DVR)
Now use
the Bayonet Neill-Concealman (BNC) connector for the Surveillance equipment
purpose. The usage of the BNC cable is very simple because of its both sides
similar construction. Place one of its ends into the DVR input and the other
into the CCTV camera output with the help of a small nut. This small nut helps
to lock the wire in its position.
Further,
note that which input you are plugging. This is because you need to place the
DVR in order, to get the view of the camera’s video.
Moreover,
there is no BNC connector in your camera device then you can buy it separately
from a store.
Step 5:
Make The Link Between Your Wireless Cameras With The Computer
Every
Wireless camera pack contains an installation software disc. Use this in your
computer device and follow all the on-going instructions by opening it. If it
asks you to enter your cameras IP address then provide it. If you don’t know
the IP address, then you can get it using the Command Prompt window. After
completing the ongoing steps keep studying this below lines to complete the
CCTV installation process.
Step 6:
Connect Your Monitor With DVR
Finally,
connect your computer with DVR with the help of BNC or HDMI cables. After doing
this, you can be able to run the CCTV device videos on your monitor.
Hope, by
studying this article in details you can be able to perform the CCTV
installation process on your own.


Comments
Post a Comment